When moving QuickBooks data from one system to another, sometimes, you might receive an error message that tells you that QuickBooks migration failed unexpectedly. This error message appears right after clicking the .bat or .exe file, selecting the move QuickBooks option in the migrator tool, or during the migration process. This guide will show you why the QuickBooks Migrator Tool failed unexpectedly and how to fix this error.
In some cases, you might encounter this error when moving QuickBooks Desktop Pro from one SSD to another, from Windows 7 to 10 or 11 OS, or while moving QuickBooks on the same version of Windows. This problem severely disrupts your business operations, causing unnecessary delays in finishing crucial projects.
Fortunately, there are several ways to troubleshoot this error in no time. Let’s check out the entire article to know why we face this issue and what methods we can utilize to resolve it.
Why is QuickBooks Desktop Data Migration Not Working?
Here are the factors that might provoke the QuickBooks migration failure error:
- Using an obsolete Windows version on the system.
- Corruption in the QB company data.
- Running an outdated QuickBooks Desktop version.
- Damaged QuickBooks program.
- Faults in various system files and folders.
- Your computer might not satisfy the system requirements for QuickBooks.
Now that you know about various reasons behind this error, let’s scroll down to the following section to explore comprehensive troubleshooting methods for it.
11 Solutions to Try If QuickBooks Migration Failed Unexpectedly
Below are proven solutions that you can utilize if you encounter the QuickBooks migration failed unexpectedly error message. Make sure that you implement these solutions in the correct order.
1. Install the Latest Windows Updates
You are likely to experience failure when migrating QB Desktop data if you are using an outdated Windows version. To fix this issue, you need to install the newest Windows updates on your computer.

Once you have installed the latest Windows updates, you can run the QB Migrator Tool to transfer your QB data. If you are still unsuccessful, consider using the next resolution.
2. Operate the Quick Fix my Program Tool
Defects in the QuickBooks program can trigger several problems, including failure in migrating company data. You need to use the Quick Fix my Program tool to resolve these issues. Here’s how to do so:
- First and foremost, you should install QuickBooks Tool Hub on your computer.
- Once the installation is finished, double-click the QB Tool Hub icon on the desktop to launch the QuickBooks Tool Hub window.
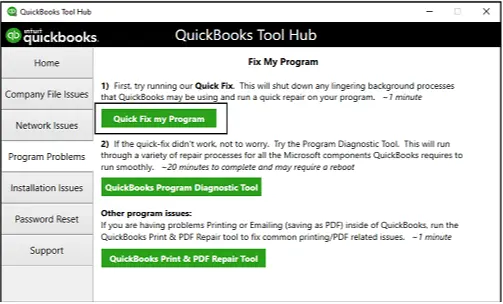
- Now, go to the Program Problems tab in QuickBooks Tool Hub and select the Quick Fix My Program Tool.
- When you have run the Quick Fix my Program tool, you should close the QB Tool Hub and start the QB data migration process.
Do you still get the QuickBooks migration failed unexpectedly error message? If that’s the case, try updating QB Desktop as described below.
3. Install QuickBooks Updates to Fix the QuickBooks Migration Failed Unexpectedly Error
When you utilize an outdated QB Desktop version, you are likely to experience QB data migration failure. To resolve this problem, you must install QuickBooks Desktop updates on your computer.
Once you have installed QB Desktop updates, try using the migration tool to transfer your company data to the new system. If you still encounter the QuickBooks migration failed unexpectedly error message, consider removing third-party apps from QB as described below.
4. Turn Off Third-Party Apps in QuickBooks
Sometimes, third-party apps integrated into QuickBooks Desktop can interfere with the QB data migration process. You need to disable all such apps to ensure that you can smoothly carry out the QB data migration process. Here’s what you should do:
- Firstly, open QuickBooks Desktop, and after that, you have to choose the Edit menu.
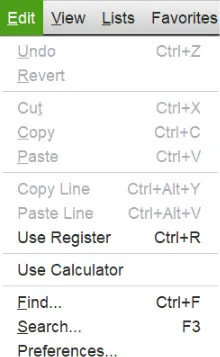
- Select the Preferences tab to launch the Preferences window. After that, go to the Integrated Applications option.
- At this point, you need to choose the Company Preferences option.
- Now, identify the integrated third-party app that you want to remove and unmark the checkbox against it.
- Tap OK and exit QuickBooks Desktop on your system.
You should now try migrating your QB data to the new computer. If you continue to get the QuickBooks migration failed unexpectedly error message, try using the verify and rebuild data tool as discussed below.
5. Run the Verify and Rebuild Data Tool to Fix Your Company Data
Damage in various company files can provoke the QB data migration failure. To fix company data damage, you should run the verify and rebuild data tool. Once you do so, you can seamlessly migrate your company data to the new system.
If, however, you still fail when migrating QuickBooks data, consider running the QB Migrator Tool in compatibility mode as outlined below.
6. Use the QB Migrator Tool in Compatibility Mode
The QB Migrator Tool might not work correctly due to compatibility issues with the Windows operating system. To fix this issue, you should run the QB Migrator Tool in compatibility mode. Here’s how to do so:
- Firstly, open the QB Migrator Tool folder and right-click the ‘.exe’ file.
- Select the Properties tab, and after that, you should jump to the Compatibility menu.
- At this point, check the Run this Program in Compatibility Mode checkbox.
- Click OK at the bottom of the Properties window, and after that, you can run the migrator tool.
Do you continue to experience failure when migrating QuickBooks Desktop data? If so, try exempting QB programs in Windows Firewall as described below.
7. Put QB Programs in the Exception List of Windows Firewall
Windows Firewall can stop certain QB programs from running on your system. As a result, you might experience problems when using the QB Migrator Tool to migrate your company data. To resolve this issue, you need to exempt QB programs in Windows Firewall.
If, however, you get the QuickBooks migration failed unexpectedly error message even after exempting QB programs in Windows Firewall, try the next solution.
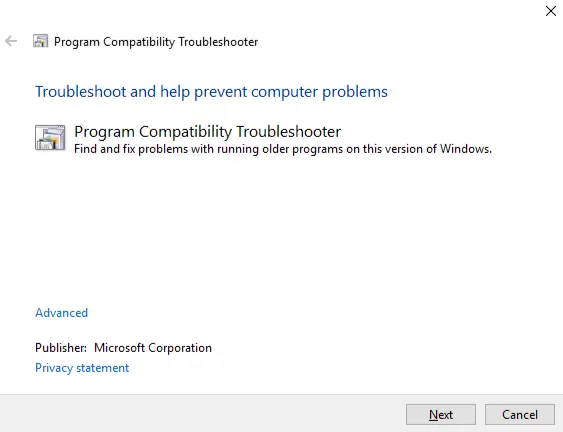
8. Utilize Windows Program Compatibility Troubleshooter
Windows Program Compatibility Troubleshooter can resolve various internal issues that might be hindering the execution of the QB Migrator Tool on your system. Here’s how you can operate this utility:
- Firstly, open the Control Panel, and after that, quickly jump to the Programs and Features tab.
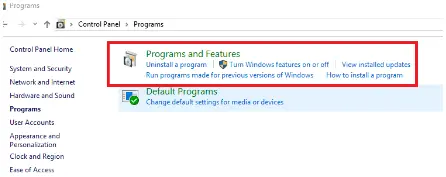
- Select the Run Programs Made for Previous Windows Versions option.
- At this point, choose Windows Program Compatibility Troubleshooter, and after that, tap the Next button.
- In the list of installed programs, you need to choose QuickBooks.
- Windows Program Compatibility Troubleshooter will now start running. Once its execution is finished, you can see various issues on the screen.
- To fix these issues, tap Next and allow the troubleshooter to repair the QuickBooks application.
- Finally, you can launch QB Desktop and run the QB Migrator Tool to transfer your company data.
Do you still see the QuickBooks migration failed unexpectedly error message? If so, try creating QB program exclusions in antivirus software as detailed below.
9. Exclude QB Programs in Your Antivirus Application
The antivirus app installed on your computer can interfere with the operation of various QB programs. Consequently, you might be unable to use the QB Migrator Tool to transfer your data. You should create exclusions for QB programs in antivirus software to fix this issue.
If, however, you still notice the failure of the QB data migration process, consider repairing system files as discussed below.
10. Use System File Checker to Repair Your System Files
Faults in different system files can hinder the execution of the QuickBooks Migrator Tool. As a result, you will see that the QB data migration process has suddenly failed. You can use System File Checker to scan and repair system files. Here’s how you need to do so:
- Press the Windows + X keys and open the Start menu options on Windows Desktop.
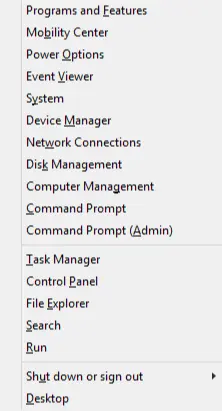
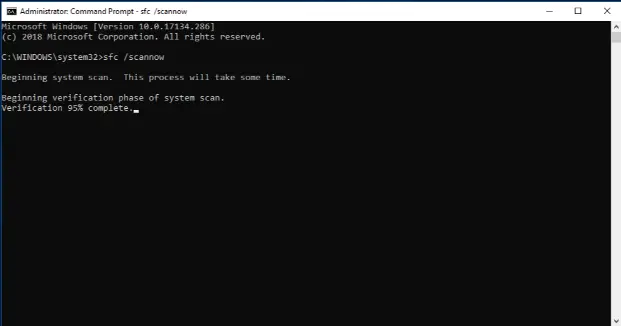
- Choose Command Prompt (Admin), and after that, move to the Command Prompt window.
- Type sfc/scannow and hit Enter. Now, wait until the System File Checker scans and repairs your system files.
- Once the process is finished, reopen your computer and migrate your QB data.
Do you continue to see the QuickBooks data migration failure error? If so, consider manually migrating your QB data as outlined below.
11. Use the Manual Process to Migrate QuickBooks Data
You can manually migrate your QB data by using a USB flash drive. Firstly, you will copy the QB data to the USB flash drive, and after that, you will use the same USB flash drive to migrate your data to the new computer. Here are the steps that you must follow:
Step I: Ensure that Your Computer Meets All the System Requirements For QB
The first step is to ensure that you fulfill system requirements for QuickBooks Desktop on the new computer. This will allow you to migrate your QB data without facing any challenges. Once you have ensured that your new computer meets all the system requirements for QuickBooks, you can proceed to the following step.
Step II: Get the Product and License Info
You need to have your product and license info ready so that you can activate QuickBooks on the new computer after the installation. Here’s what you can do:
- Launch QuickBooks and press the F2 key on the keyboard to open the Product Information window on the screen.
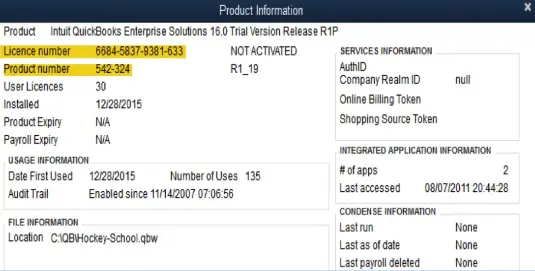
- Note the license, product name, and number and exit the window.
- You can also visit your Customer Account Management Portal (CAMPs) account to view your license key and product info.
Now that you have the license & product information, let’s go to the next step to install QB Desktop on the new system.
Step III: Download and Install QuickBooks on the New Computer
The next step is to download, install, and activate QuickBooks on the new computer to import the data from the old computer into it. Here’s what you should do:
- If you already have some other version of QuickBooks installed on the new computer, uninstall it.
- Next, visit the QuickBooks Product Download Page and choose your Country, Product, and Version.

- Click Search and hit the Download option on the next page.
- Find and double-click the QuickBooks.exe in the default download location, follow the on-screen instructions, and accept the product license agreement.
- Hit Next and enter the license and product number when prompted.
- Click Next and launch QuickBooks Desktop using the shortcut icon on the desktop.
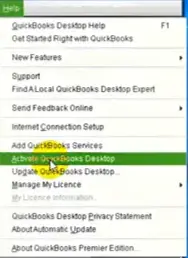
- Now go to the Help tab and choose the Activate QuickBooks Desktop option.
- Verify your info by following the instructions on the screen.
Let’s navigate to the following step to create the backup company file on the old system.
Step IV: Back Up the Company File on the Old Computer
The instructions below will help create a backup company file so that you can move it and restore it on the new computer.
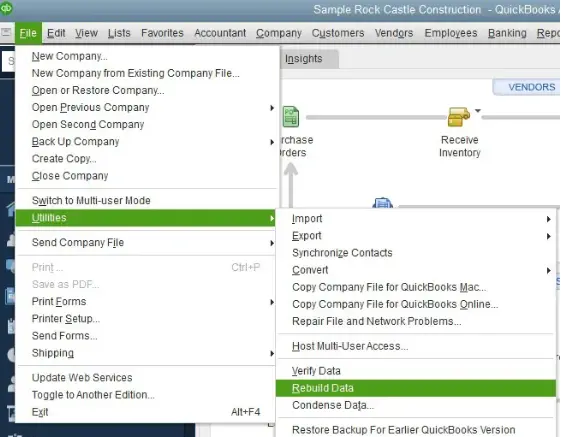
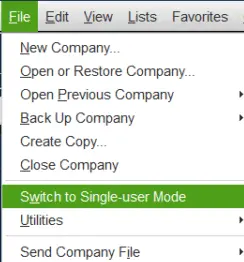
- Go to the File menu in QuickBooks on the old computer and choose the Switch to Single-user Mode option.
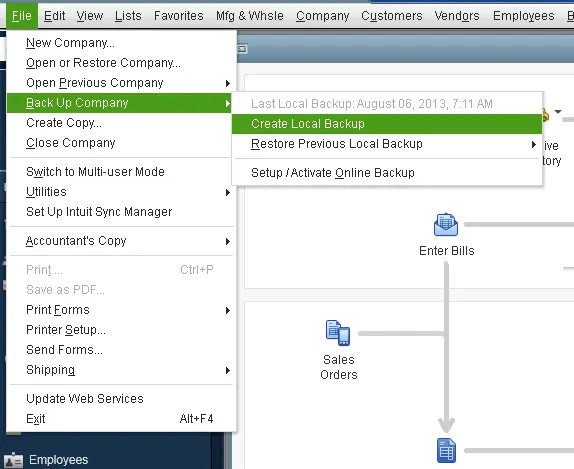
- Go to the File menu again and select the Create Local Backup option under the Back up Company drop-down.
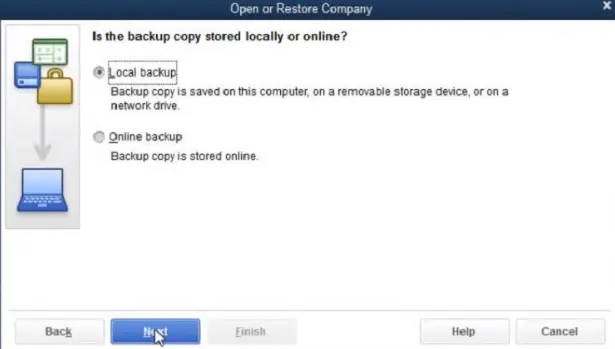
- Select the Local Backup option and move to the option that says Next.
- Select the Browse option to choose a location to save the backup company file in the Local Backup Only section.
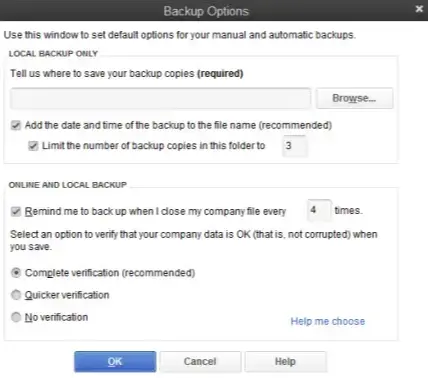
- QuickBooks will now run a quick test to ensure the company file is free of errors.
- Hit the OK option when you are ready and click Save it Now.
- Click Next, and QuickBooks will save a backup copy of the company file in the selected location.
- Copy the backup copy of the company file to the USB drive.
Now that you have moved the company data to the USB drive, let’s scroll down to the next step and restore the same data to the new computer.
Step V: Restore the Company File on the New Computer
The last step in moving QuickBooks Desktop is to restore the backup company file on the new computer. Here’s what you can do:
- Plug the USB drive into the new computer and move the backup copy of the company file to the local storage.
- Launch QuickBooks and select the Open or Restore Company option under the File menu.
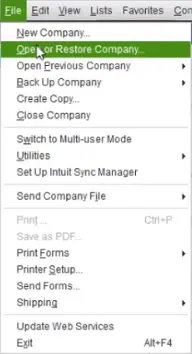
- Hit the Restore a backup copy option, click Next, and select Local Backup.
- Hit Next and browse the backup company file with the .qbb extension on the local storage of the system.
- Now, choose the folder on the system where you would like to restore the backup company file.
- Click Save when you are ready, and ensure that you give the file a unique name so that you do not accidentally replace an existing company file. If you notice that QB data restore has failed, you can fix it easily.
Finally, you can run QB Desktop on the new computer and utilize the recently migrated company data for various projects.
Wrapping Up
In this article, we showed you what you need to do if you find QuickBooks migration failed unexpectedly. Hopefully, you can now effortlessly migrate your QB company data to the new computer. If, however, you still face various challenges or have a query, you can connect with a QB professional for immediate guidance.
Frequently Asked Questions (FAQs)
Q. What are the different ways to migrate client data to QuickBooks?
A. The first approach to migrating client data to QuickBooks is using MMC Convert. Next is manually entering the data in QuickBooks, which must only be used if there is less data to be migrated. The last method uses the IIF (Intuit Interchange Format) files for client data migration.
Q. Where can I find the migration tool to return to the desktop?
A. You can easily download the migration tool from the Intuit website. Click the Get Started option on the Export overview screen and hit the Download tool option. After that, you must wait until the download process for the migration tool is finished.
Q. What if I do not have the password to restore the company file?
A. You can simply use the QuickBooks Automated Password Reset Tool to reset the password if restoring the backup is restricted by an error message like ‘Your data has NOT been restored if you failed to enter the correct admin password.’
Q. What must be done after moving QuickBooks to a new computer using the Migrator Tool?
A. Once you have successfully moved your QuickBooks Desktop to a new computer, you must first sign in to your QuickBooks payroll, payment services, and Data Protect. Then, you must move any additional company files left on the old computer, and lastly, create a backup of the company file on the new computer. If you experience QB payroll update failure on the new system, you can fix it quickly.
Q. Do I need the same product and license version to restore the backup file in QuickBooks on a different system?
A. Yes, when moving QuickBooks Desktop to a new computer using the backup file, you will need to have the same product and license version of QuickBooks on both machines.
Q. I have a Lenovo laptop with Windows 11, and QuickBooks Pro migration failed unexpectedly every time I ran the QuickBooks Migrator Tool.
A. The Migrator Tool will not work on Lenovo systems. As a workaround, you can download the installer from the official website and install it. Later, just back up the company file and restore it on the system.
Q. I am trying to move my QuickBooks 2022 to a new Windows 11 computer but getting the error message ‘QuickBooks Migration Failed Unexpectedly.’ How can I avoid getting this error during migration?
A. QuickBooks 2022 is not compatible with Windows 11. You can downgrade your system to Windows 10 Home using the same license key and later upgrade it to Windows 11 when required.
Q. While trying to download a new installer file on the new computer, I received a ‘Downloading QuickBooks Installer setup failed’ error message. How do I proceed further to download and install QuickBooks Desktop?
A. The error message you received indicated a corrupt installer file, and you must redownload it from the QuickBooks Product Download page.

Gabby Taylor, combines financial expertise with literary prowess. With over a decade in finance, she crafts insightful narratives on navigating fiscal complexities
