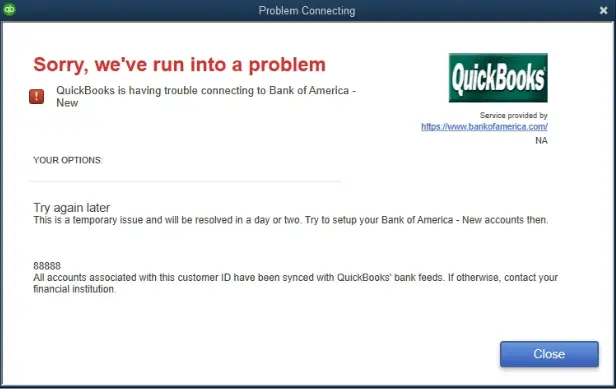
When attempting to create a new connection to Capital One, sometimes, you can get QuickBooks error 88888. As a result, you won’t be able to download your bank transactions. You might see the following error message on your computer’s screen:
| “Sorry, we’ve run into a problem. QuickBooks is having trouble connecting to Capital One-Credit Cards. Your Options: -Try again later: This is a temporary issue and will be resolved in a day or two. Try to set up your Capital One- Credit Cards then. – 88888:All accounts associated with this customer ID have been synced with QuickBooks’ bank feeds. If otherwise, contact your financial institution.” |
You can face a similar error message when downloading transactions from Bank of America, as depicted below.
Similarly, you might get the following error message while downloading Capital One bank feeds through QuickBooks Desktop on the system.
| “You’re no longer connected to Capital One – Credit Cards. Set up your connection again to continue using bank feeds.” |
Error messages like the one below can show up when you want to disable the bank feed for the account to reconnect it.
| “Your attempt to de-activate account failed. Try again after some time. If this error persist, contact your administrator.” |
The good thing is that these error messages can be effectively resolved using simple techniques. Let’s continue to explore the article to learn various reasons behind this issue and discover relevant solutions for it.
If you need immediate guidance to fix QuickBooks error 88888, you can dial 1(800) 780-3064 to connect with an experienced QB professional.
What is QuickBooks Error 88888?
QuickBooks error 88888 is one of the most frequently appearing error codes that can prevent you from downloading bank transactions. Some of the common indications of this error are described below:
- Frequent closures of QuickBooks Desktop on the system.
- Slow response of QB Desktop to various commands.
- Various error messages related to file permissions might appear on the screen.
- Some company files won’t remain accessible on the computer.
- Network failure might occur, and you might witness an abrupt system shutdown.
Sometimes, this error can arise when you attempt to add another checking account from the same financial institution. The new checking account does not show up in the bank feeds window. Consequently, you can encounter QB error code 88888 when attempting to download bank transactions using a fresh checking account.
To fix this problem, it is crucial to understand all the factors that give way to it. Let’s jump to the following section to discover all the main reasons behind this issue.
Causes of QuickBooks Error 88888
Here are all the major reasons behind the occurrence of QuickBooks error 88888:
- QuickBooks Desktop is outdated.
- The QuickBooks company file might be corrupt
- QuickBooks installation might be incomplete or damaged
- There is an incompatibility issue between QuickBooks and Windows OS.
- The network connection is unstable or slow.
Now that you know the major causes of the error, we will jump to the next section to find appropriate resolutions for it.
10 Proven Methods to Resolve QuickBooks Error 88888
Before using any method to fix QuickBooks error 88888, you should immediately do the following:
- Download & install the most recently issued QuickBooks Desktop updates on your computer. This will enable you to seamlessly use the latest bug fixes and features when implementing various resolutions.
- Get the recent Windows updates installed on your system. This will help you ensure smooth implementation of various troubleshooting tactics.
Now, let’s quickly implement all the solutions detailed below in the correct sequence:
1. Set Up a New Bank Feeds Account
The simplest way to fix error 88888 in QuickBooks is to deactivate the bank feeds account and create a new one. Here’s how you can do so:
Step I: Deactivate the Bank Feeds Account
Here are the steps through which you can make the bank feeds account inactive:
- Open the Lists menu and click on Chart of Accounts.
- Right-click the account you wish to turn off, then click Edit Account.
- Tap on Bank Settings.
- Choose Deactivate all online services, followed by OK.
- Now, click on Save & Close.
Step II: Create a New Bank Account
You can follow the points described below to generate a new bank feeds account:
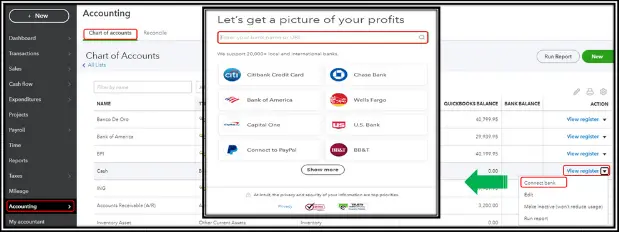
- Open the Lists menu and click on Chart of Accounts.
- Right-click anywhere in the Chart of Accounts window and select New.
- For the Account Type, choose Bank.
- Type in the bank name in the Account Name field.
- At the end, click Save & Close.
Step III: Merge the Two Bank Accounts
You can merge the two accounts by assigning the name of the new account to the old bank account, as discussed below:
- Right-click the old account and choose Edit.
- Type the exact name of the new account in the Account Name field.
- When you see the merge warning dialog box, choose Yes.
Now, you can start downloading transactions in the new bank feeds account. If you still encounter QuickBooks error 88888, you should implement the following resolution.
2. Manually Deactivate the Old Bank Feeds Account
Manually deactivating the old bank feeds account can help you effortlessly resolve the 88888 error code in QuickBooks. In order to do so, you need to export the chart of accounts to Excel, edit the file there, and import it back. Here’s how you can do so:
Step I: Export chart of accounts
Here is how you can export the chart of accounts to an IIF File:
- Firstly, if you are running QuickBooks in multi-user mode, make sure to switch to single-user mode immediately.
- Now, go to the Utilities tab in the File menu on the window.
- Tap on Export and then click on Lists to IIF Files.
- Choose the Chart of Accounts followed by OK.
- Browse and choose where you wish to save the IIF file.
- Type in the filename. Now, select Save.
Step II: Edit the IIF file in Excel
Now, let us proceed and edit the IIF file in Microsoft Excel according to the following points:
- Launch MS Excel and open the File menu.
- Choose Open and then browse to the location where you saved the IIF file. If you can’t locate the IIF file, go to the File type dropdown and choose All Files.
- Now, click on the IIF file followed by Open.
- When the Text Import Wizard opens, choose Next and Finish as required.
- Scroll down to where QB ONLINE is.
- For all the banking columns, change Y to N:
- OLBANKING
- OLBILLPAY
- OLENABLED
- OLTAB
- Open the File menu and choose Save. Click Yes, which will allow you to keep using the current format.
- Finally, close Microsoft Excel.
Step III: Import the IIF file to QuickBooks
Lastly, you will need to import the IIF file to QuickBooks Desktop as described below:
- Launch QuickBooks Desktop.
- Open the File menu and choose Import.
- Now, select the option to export From IIF Files.
- Navigate to the folder where you saved the IIF file.
- Choose the suitable IIF file and then select Open.
- Finally, tap on OK when you get a confirmation saying the import is successful. To ensure that the bank account has been deactivated, make sure the blue circle or lightning bolt is gone. Open Lists, followed by Chart of Accounts.
Now, after successfully deactivating the old account for bank feeds, go back to the previous solution and follow steps II and III to create a new bank account and merge it with the old account. If you still get QuickBooks error 88888, consider repairing your company file as outlined below.
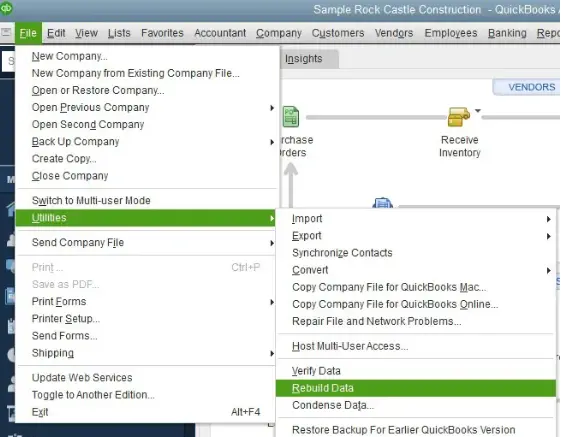
3. Utilize the Verify and Rebuild Data Tool to Fix QuickBooks Error 88888
The error message 88888 in QuickBooks can occur if your company file is corrupted. You need to immediately run the verify and rebuild data utility to remove all data damages from the company file. Once you do so, you can successfully download all bank transactions.
If, however, you still encounter QuickBooks error 88888, try downloading your bank transactions in Classic Mode, as discussed below.
4. Use Classic Mode to Download Bank Transactions
One of the easiest ways to fix error code 88888 in the QB application is to switch the mode of your bank feeds. You can utilize the Classic Mode feature to ensure seamless download of your bank transactions. Here’s how you need to do so:
- First and foremost, move to the File menu in QuickBooks and select the Switch to Single-User Mode option.
- Now, access Edit and click the Preferences tab. After that, choose Checking and click Company Preferences.
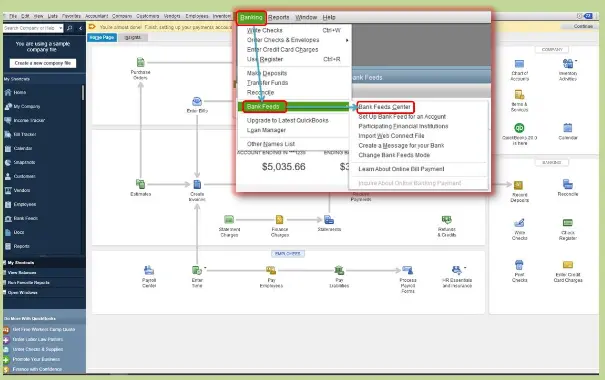
- At this point, jump to the Bank Feeds section and choose Classic Mode.
- Tap OK to save your modified preferences. After that, you can start downloading your bank transactions.
Are you still facing QuickBooks error 88888? If so, consider checking for conflicting applications on your system, as described below.
5. Close All Conflicting Programs On Your Computer
The execution of multiple programs on the system can hinder the functioning of QuickBooks Desktop. As a result, you might encounter error code 88888 in QB when downloading bank transactions. You can also face various company file errors, such as QuickBooks error code 12 0, due to conflicting applications.
To fix this issue, you can close unnecessary programs on your system. Here’s how to do so:
- Firstly, access the Task Manager window by tapping Ctrl + Alt + Delete.
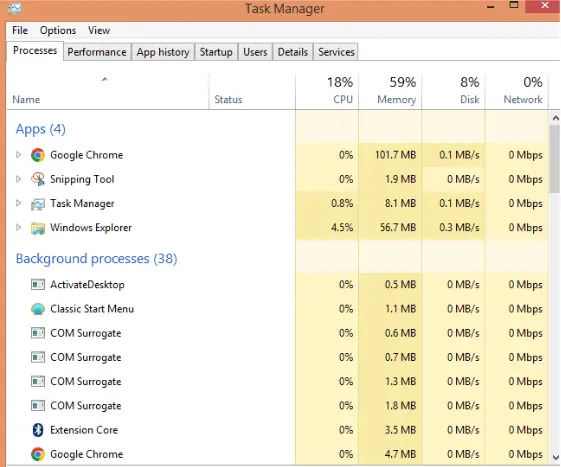
- Jump to the Processes tab and immediately look for any programs that might be conflicting with QuickBooks.
- Select all the applications that you want to close. After that, tap the End Task button to make sure that all the selected programs are stopped.
- Finally, you can move out of the Task Manager window and start downloading your bank transactions via QuickBooks.
Do you continue to encounter QuickBooks error 88888? If that’s the case, consider granting full exemption to QuickBooks in Windows Firewall as discussed below.
6. Provide Total Exemption to QB in Windows Firewall
Windows Firewall can quickly stop the downloading process for bank feeds if it perceives QB Desktop as a threat to system safety. As a result, you can encounter error 88888 in QB. To resolve this problem, you have to provide a complete exemption to QuickBooks in Windows Firewall. Once done, you can seamlessly download all the bank transactions on your computer.
If you get QuickBooks error 88888 even after resetting Windows Firewall settings, consider checking your bank notifications as discussed below.
7. Review Your Official Bank Notifications
All banks modify their service policies, regulations, and product guidelines from time to time. If your official bank has updated its rules and policies, you need to review them. This will ensure that you can implement all the necessary steps to ensure a smooth download process for bank transactions in QuickBooks.
To review your bank notifications, access your official bank’s website and open your online bank account. Check for any new messages and notifications. You should take the necessary action to implement all the new changes. Once done, you can download all bank transactions successfully.
If you still get QuickBooks error 88888, consider granting exemption to QB in your antivirus software as explained below.
8. Add QuickBooks to the Exemption List of Your Antivirus Software
Your antivirus application can suddenly block QuickBooks by regard it as a threat to computer safety. Consequently, you might fail when downloading bank feeds, and QB error 88888 can occur. To fix this issue, you can provide total exemption to QuickBooks in antivirus software. Once done, you can quickly download all the bank transactions.
If you continue to face QuickBooks error 88888, try erasing temporary files on your system, as discussed below.
9. Carry Out Disk Cleanup On Your Computer
The presence of various temporary files and damaged system files can reduce system performance. Moreover, these files can hinder the efficient operation of QuickBooks Desktop. As a result, you might face the 88888 banking error code in QuickBooks. To fix this problem, you need to delete all the irrelevant files. Here’s how you can do so:
- Access File Explorer and right-click the C: drive on the computer.
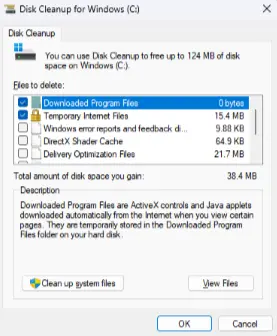
- Choose Properties and immediately tap Disk Cleanup.
- At this point, choose all the files that you want to erase. After that, tap the Clean Up System Files button immediately.
- Reopen your computer and quickly download all the bank feeds in QuickBooks Desktop.
Are you still noticing QuickBooks error 88888 on the screen? If so, consider repairing your QuickBooks Desktop application as described below.
10. Repair QuickBooks Installation
As we mentioned, QuickBooks error 88888 can be a result of damaged or incomplete installation. Therefore, we recommend you to run QuickBooks Install Diagnostic Tool.
But first, you will need to download and install QuickBooks Tool Hub on your system. Once done, follow the steps below.
- Open QuickBooks Tool Hub.
- Navigate to the Installation Issues tab.
- Choose Run QuickBooks Diagnostic Tool Hub.
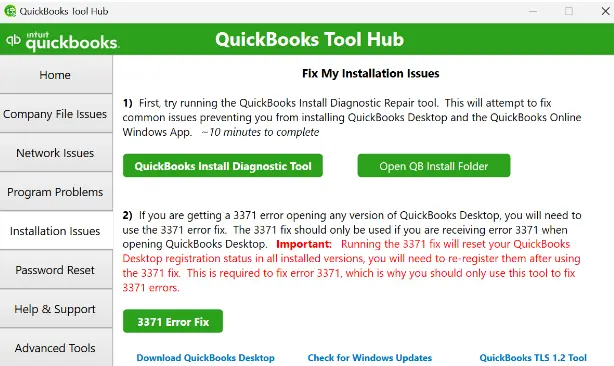
- Give the tool a while to finish repairing.
- Once it is done, restart your computer.
Finally, you can access QuickBooks Desktop and seamlessly download all bank transactions.
Summing Up
In this extensive guide, we have discussed recommended solutions for QuickBooks error 88888. Hopefully, you can now download all bank transactions on your computer. If, however, you continue to face this error code or have a query, you can immediately connect with an experienced QB professional for real-time guidance.
Frequently Asked Questions (FAQs)
Q. What is QuickBooks Error 88888 and why does it occur?
A. QuickBooks Error 88888 is an uncommon but critical issue that appears when QuickBooks Desktop is unable to process a specific action—usually when importing data, validating information, or running payroll. It commonly occurs due to damaged company files, corrupted Windows components, improper registry entries, or incomplete QuickBooks installations. This error may also show up if your system loses communication with QuickBooks Database Server Manager. Because it’s not a native QuickBooks error code, it often reflects a deeper underlying system or file-related problem.
Q. How do I recognize that QuickBooks Error 88888 is affecting my system?
A. You’ll typically notice QuickBooks Error 88888 when QuickBooks freezes unexpectedly, hangs during payroll operations, fails to load a report, or crashes while processing data. Sometimes, QuickBooks opens but shuts down immediately after performing a command. Users also report seeing incomplete lists, missing transactions, or partial data entries before the error appears. These symptoms signal that QuickBooks can’t read essential company file components properly.
Q. Why does Error 88888 appear only on one computer?
A. Because this error is often environment-specific. Differences in Windows configuration, user permissions, display settings, or installed updates can cause the issue on one workstation while others remain unaffected.

Gabby Taylor, combines financial expertise with literary prowess. With over a decade in finance, she crafts insightful narratives on navigating fiscal complexities