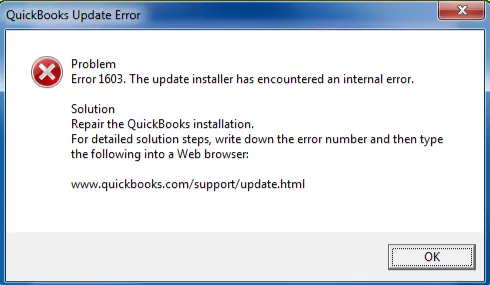
When installing QuickBooks Desktop on your computer, sometimes, you might see the Quickbooks error 1603 when updating message on the screen:
| “Error 1603: The update installer has encountered an internal error.” |
QuickBooks error 1603 can also manifest when you attempt to download and install software updates. This error code primarily occurs due to faulty Windows components installed on the computer.
Apart from the error message depicted above, you might notice the following indications on your system:
- The QB installation window freezes or becomes completely unresponsive.
- You won’t be able to utilize certain programs and applications on your computer.
- QB Desktop may be installed partially, and specific features might be missing.
- Unexpected system shutdown can occur.
The good thing is that there are many tried and tested countermeasures that you can use for this problem. Let’s dive into the article to learn all the major causes behind this error and explore verified solutions.
Quick Fix for QuickBooks Error 1603 When Updating
1. Close QuickBooks and all running apps.
2. Download and run QuickBooks Tool Hub.
3. In Tool Hub, select “Program Problems” → Fix “QuickBooks Update Error 1603.”
4. Restart your computer.
5. Retry updating QuickBooks.
Tip: Make sure Windows Installer is up-to-date and antivirus/firewall is temporarily disabled.
Why Do You Get Installation Error 1603 in QB Desktop?
The following factors can provoke QuickBooks error 1603 on your system:
- Corrupted or damaged Windows Installer.
- Partial download of QB installation files.
- Restrictive Windows security policies.
- Malware attacks on important system files and folders.
- Damaged Windows Registry setup.
- Outdated Windows version on the system.
Let’s jump to the next section to look at some fast fixes for this error code.
Simple Hacks to Fix 1603 QuickBooks Installation Error Code
Here’s the table that shows effective solutions that you should use for QuickBooks error 1603. Implement these fixes and successfully install QuickBooks on your computer.
| Common Reasons | Relevant Solutions |
| Outdated Windows edition | Install new Windows updates |
| Defective .NET Framework component | Repair .NET Framework component |
| Corrupted Microsoft MSXML component | Fix Microsoft MSXML component |
| Obstructive Windows security policies | Modify the Windows security policies |
| Damaged Windows Registry settings | Repair Windows Registry |
Now, let’s quickly move to the following section to find detailed step-by-step methods to fix this problem.
10 Powerful Methods to Eliminate QuickBooks Error 1603
The following tactics help you resolve QuickBooks error 1603 easily and effectively. Make sure to implement them in the order as given below.
1. Run the QuickBooks Install Diagnostic Tool from the Tool Hub
The QuickBooks Install Diagnostic tool is one of Tool Hub’s utilities designed to help users fix program installation errors and issues with Microsoft components, such as the .NET Framework, C++, and MSXML files. You can easily use this tool to resolve the 1603 installation error code in QB. Here’s how you can do so:
- Firstly, you need to install QuickBooks Tool Hub quickly on your system.
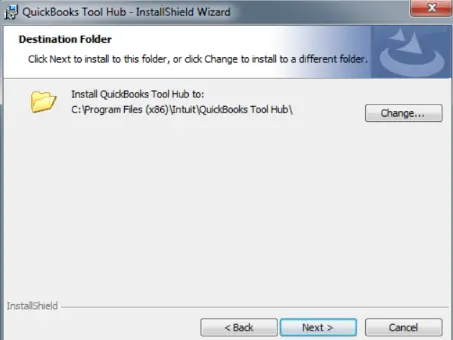
- After that, double-click the QB Tool Hub icon on your computer’s home screen and select Installation Issues.
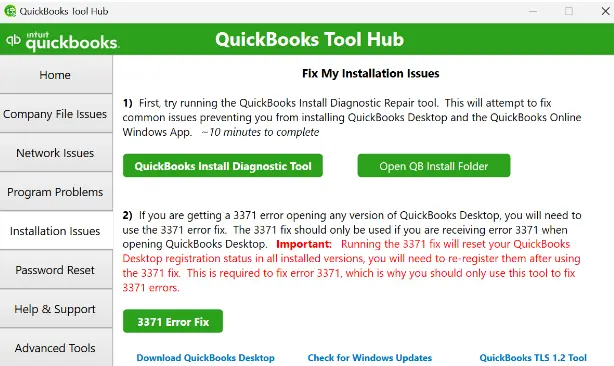
- Further, click on QuickBooks Install Diagnostic Tool. The tool might take up to 20 minutes to complete the repair; wait until then.
- Once done, restart your computer and try installing QuickBooks or downloading the updates.
If you are still experiencing QuickBooks error 1603 when updating, continue moving to the next troubleshooting solution.
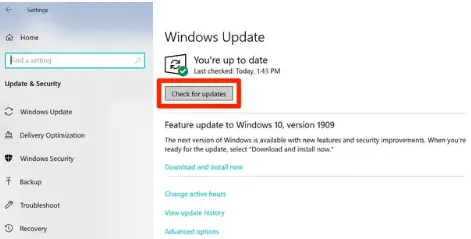
2. Install New Windows Updates
You must download the latest Windows updates as soon as they are available for optimum performance and stability. Also, it prevents and often fixes installation issues and errors that interrupt the QB update process.
If you can install or update QuickBooks, you’re good to go. If not, continue to the next solution to fix the 1603 fatal error during installation.
3. Fix the Microsoft .NET Framework Component
The installation of QB Desktop requires specific Windows components, such as the Microsoft .NET Framework component. You won’t be able to install or update QB if this component is corrupted. Here’s how you need to fix this component:
- Close all the programs running on Windows and then go to the Windows Start menu.
- In the search field, type Control Panel and then choose it from the search results.
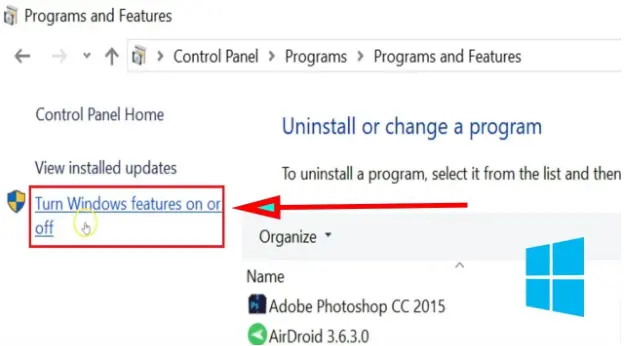
- Click on Uninstall a Program in the options on your screen.
- Rather than uninstalling any program, click Turn Windows features on or off.
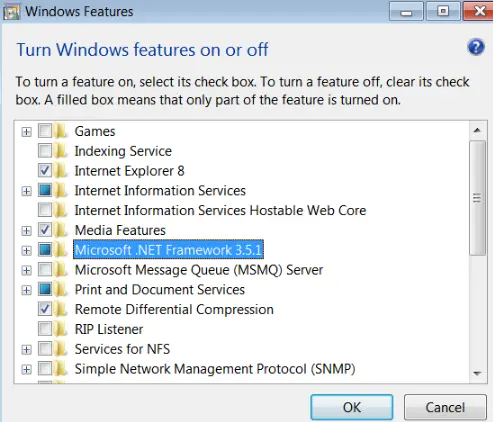
- Doing this will redirect you to the Windows Features window.
- In the list of Windows features, find the .NET Framework.
Review the settings for both .NET Framework 4.5 (or later) and .NET Framework 3.5 SP1.
Note: The steps to review the .Net Framework 4.5, 4.6, 4.7, and 4.8 are the same.
Step I: Check .NET Framework 4.5 (or Later)
If the .NET Framework 4.5 (or later) checkbox isn’t marked in Windows features:
- Mark the checkbox to turn ON .NET Framework 4.5 (or later).
- Now, click OK to save these changes.
- Finally, restart your computer.
Steps to follow if the .NET Framework 4.5 (or later) checkbox isn’t selected:
- Select the checkbox to turn off the .NET Framework 4.5 (or later). Do not turn it back on.
- Save the changes by clicking OK.
- Now, restart your computer.
- When signed in back to Windows, turn it back ON by following the provided steps.
Step II: Check .NET Framework 3.5 SPI
If the .NET Framework 3.5 SPI checkbox isn’t selected:
- Select the .NET Framework 3.5 SPI checkbox to turn it ON.
- Click OK to save the changes.
- Now, restart your computer.
If the .NET Framework 3.5 SPI checkbox is selected:
- Turn off .NET Framework 3.5 SP1 by selecting the checkbox. Keep it turned off.
- Save these changes by clicking OK and restart your computer.
- Once you’re signed back into Windows, follow the below steps to turn on .NET Framework 3.5 SP1 again.
Now, try installing and updating QB Desktop once again. If you continue to face QuickBooks error 1603, consider repairing Microsoft MSXML as discussed below.
4. Repair the Microsoft MSXML Component to Fix QuickBooks Error 1603
Microsoft MSXML provides the necessary tools to validate XML-based configuration files that are utilized by QB Desktop. Furthermore, it helps in verifying new QB updates on your system. If this component is damaged, you won’t be able to install or update QB. Here’s how you can fix this component:
Case A: Register the MSXML in a 64-bit Windows
Here are the steps to register MSXML on a 64-bit system:
- Open the Windows Start menu and then search for CMD.
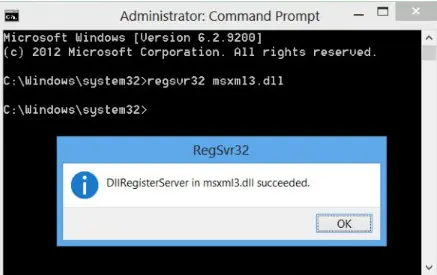
- Now, right-click on the CMD application in the search result and then select Run as Administrator.
- Enter cd\windows\syswow64 in the command prompt window.
- Further, type regsvr32 MSXML6.dll and press the Enter key.
- Once done, try to install or update QuickBooks Desktop.
Case B: Register the MSXML in a 32-bit Windows
Here’s how you can register Microsoft MSXML on a 32-bit system:
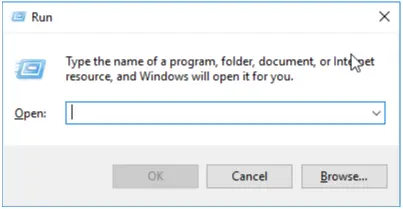
- Open the Run window by pressing the Windows + R keys simultaneously.
- Enter cmd in the Run prompt and then press the Enter key.
- In the Command Prompt window, type regsvr32 MSXML6.dll and hit Enter.
- Once done, retry to install or update QuickBooks Desktop.
If repairing the Windows component helped you fix QuickBooks error 1603, you’re all set to go. However, if the error persists, follow the troubleshooting method explained below.
5. Modify the Windows Local Group Policies
The Windows operating system has certain internal security policies regarding the installation of third-party apps. Once you modify these policies, you can ensure easy installation of QuickBooks Desktop. Here’s how you need to do so:
- Firstly, you have to access Windows using admin-level privileges.
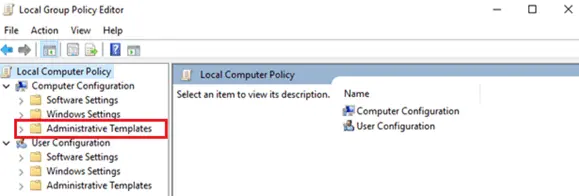
- Now, press Windows + R to launch the Run window and type gpedit.msc in the box.
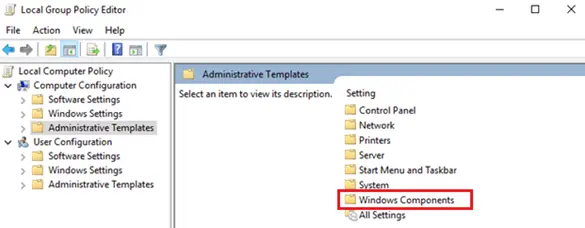
- Go to the Local Group Policy Editor window and select Administrative Templates.
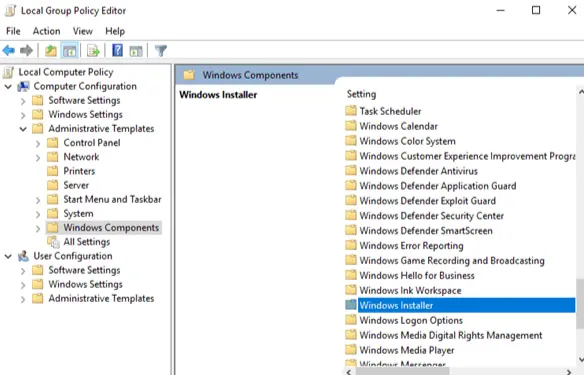
- Choose Windows Components, and after that, click Windows Installer.
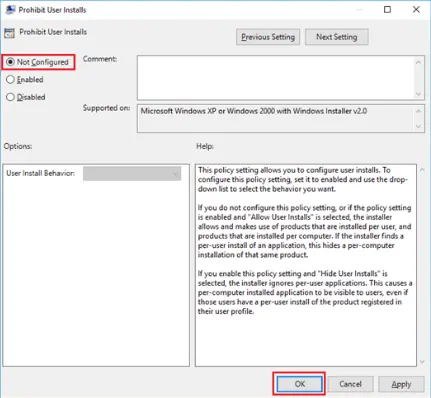
- Identify the Prohibit User Install tab and double-click it.
- At this point, mark the Not Configured option and tap OK.
- Finally, you can try installing QuickBooks on your system.
Are you still encountering QuickBooks error 1603? If that’s the case, try disabling UAC as described below.
6. Turn Off the User Account Control (UAC) On Your Computer
The purpose of User Account Control (UAC) is to ensure optimum security for all users. Sometimes, however, it can abruptly stop the installation of QB Desktop. In such cases, you should deactivate UAC on your computer. Here’s how you can do so:
- Firstly, click Start and immediately tap the Control Panel icon.
- In the Control Panel window, choose User Accounts.
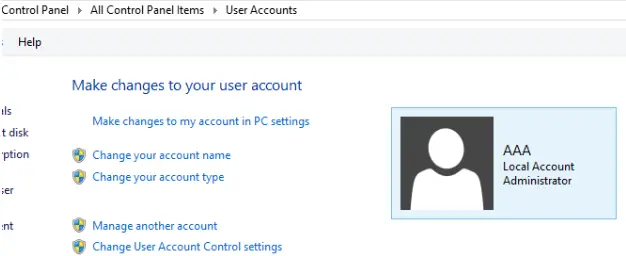
- At this point, move to the User Accounts (Classic View) tab.
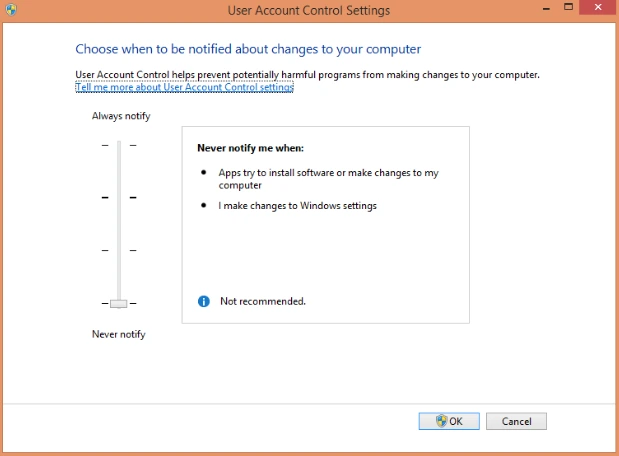
- Choose User Account Control Settings, and after that, transfer the slider to Never Notify.
- Tap OK to switch off the UAC feature, and after that, reboot the system.
Now, try installing QuickBooks Desktop on your computer. Do you still see the 1603 QB error message? If so, try disabling Windows Firewall, as discussed below.
7. Switch Off the Windows Firewall On the System
Windows Firewall can restrict the installation and update of QuickBooks Desktop on your computer. You need to disable Windows Firewall to ensure the successful installation of QB on the system. Once done, you can easily activate Windows Firewall.
Do you continue to get the 1603 error code when updating QuickBooks? If so, try excluding QB programs in the antivirus software, as detailed below.
8. Exclude All QB Programs in the Antivirus Software
The antivirus software installed on your system can restrict you from downloading new QB Desktop updates. To resolve this issue, you should exclude all QB programs in the antivirus program on the system. Once done, you can effortlessly download and install various QB updates.
If you continue to see the QuickBooks 1603 error message on the screen, consider reinstalling QB as detailed below.
9. Reinstall QuickBooks Desktop On Your System
Reinstalling QuickBooks on the computer can help you easily fix several technical issues. Here’s how you can do so:
Step 1: Uninstall the QuickBooks Application
Here are the points that you should follow to uninstall QB:
- Go to the Taskbar and click the Windows icon to open the Windows Start menu.
- Now, search for the Control Panel and select it to open from the search results.
- From the options on your screen, click on Uninstall a Program.
- Now, choose the version of QuickBooks you are using and click on Uninstall/Change.
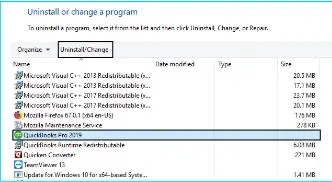
- Further, click Remove and then Next.
(If you didn’t find this option, you need to sign out of Windows and sign in again as an admin.)
Step 2: Install a New Edition of QuickBooks Desktop
After removing the QuickBooks Desktop application from your computer, it’s time to reinstall it. Reinstalling the program will automatically replace the previously downloaded files with the new ones.
To prepare for the installation, you must make sure that your computer meets QuickBooks’ minimum system requirements. After doing so, you need to utilize the steps mentioned below.
- First and foremost, you have to open your web browser and access the QuickBooks product download page.
- After that, download the QB installer file and obtain the relevant product and license numbers.
- Go to the QuickBooks installation files and open it.
- Follow the on-screen instructions and agree with the product’s terms and conditions.
- Now, enter the product and license number and then click Next.
Note: To complete the installation, ensure a stable internet connection.
Now, QuickBooks will ask you to choose an installation path based on your requirements: Express, Custom, or Network Install.
As we reinstall QuickBooks Desktop, you should use the Express installation path. Follow the below steps to complete the process by following the process mentioned below:
- Choose Express and then click on Next. Then, select Install.
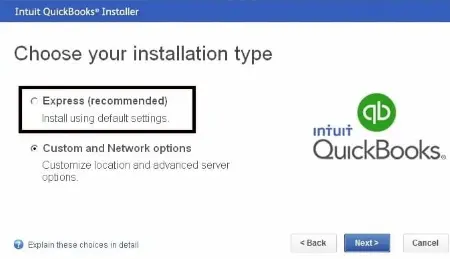
- Once done, open QuickBooks and check if the QuickBooks Desktop Pro error 1603 is fixed.
If QuickBooks Install error 1603 continues to appear, implement the solution described below.
10. Uninstall QuickBooks and Rename the Installation Folders
If reinstalling QuickBooks doesn’t help you fix QuickBooks error 1603 when installing, it is suggested that you uninstall the program and then rename the installation folders. Here’s how you need to do so:
- Uninstall QuickBooks Desktop again.
- Now, open the Windows Start menu and search for File Explorer.
- Choose it in the search results to open it.
- In File Explorer, go to the folder that holds your QuickBooks company files. This folder is usually found in these locations:
- C:\ProgramData\Intuit\QuickBooks (year)
- C:\Users\(current user)\AppData\Local\Intuit\QuickBooks (year)
- C:\Program Files\Intuit\QuickBooks (year)
- 64-bit version C:\Program Files (x86)\Intuit\QuickBooks (year)
- Right-click on the QB company file folder and choose Rename.
- Now, add the word ‘.OLD’ at the end of the folder name. Renaming prevents older files in the folder from being used during installation.
- Once done, reinstall the QuickBooks program.
While renaming the folder, there is a chance of getting error messages. If you get any error messages, follow the below steps to fix:
- Go to the Windows TaskBar and then choose Task Manager.
- Move to the Processes tab and select the Name header to sort the list alphabetically.
- Select these processes and then click End Process for each: QBDBMgrN.exe, QBDBMgr.exe, QBCFMonitorService.exe, and Qbw32.exe.
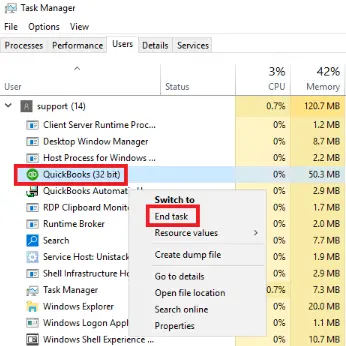
- If you see the message, “WARNING: Terminating a process can cause undesired results…” click Yes.
Finally, you can install and update QuickBooks Desktop successfully on your computer.
Winding Up
In this comprehensive article, we showed you how to resolve QuickBooks error 1603 using proven methods. Hopefully, you can now install and update QuickBooks easily and effectively.
If, however, you continue to get this error code or have a query, you should connect with a QB professional for immediate guidance.
Frequently Asked Questions (FAQs)
Q. What is QuickBooks Error 1603 when updating, and why does it create so much panic among users?
A. QuickBooks Error 1603 appears when the installation or update process fails due to broken components, missing Microsoft dependencies, or corrupted system files. It strikes suddenly during updates, which leaves users thinking their QuickBooks is damaged. The error blocks new features, patches, and payroll updates, making it feel far more critical than it actually is.
Q. Why does Error 1603 occur specifically during QuickBooks installation or updates?
A. This error is triggered when Windows Installer cannot access or install essential QuickBooks components. Reasons include damaged .NET Framework, unresponsive Microsoft C++ files, insufficient admin permissions, or leftover files from an earlier QuickBooks version interfering with the new update.
Q. How can I instantly fix QuickBooks Error 1603 without uninstalling the software?
A. A quick workaround is restarting your system, closing background applications, and running QuickBooks Tool Hub. Inside it, choose Installation Issues > QuickBooks Install Diagnostic Tool. This utility repairs missing components and rebuilds system files that cause Error 1603—often fixing the issue in minutes.
Q. Why is my QuickBooks not updating?
A. The unstable internet, the obsolete software, or the damaged program files may not cause QuickBooks updating. Make sure your internet is stable, use QuickBooks as an administrator, and update it.
Q. How do I clear the cache for QuickBooks?
A. To clear the QuickBooks cache, it is possible to close the program, delete the program cache files in the Temp folder, or to refresh the program data, via the QuickBooks Clean Install Tool.
Q. Will clearing my cache delete anything?
A. No, clearing the cache is just a deletion of temporary files and will not remove any of your company data, reports or settings.
Q. How to fix a corrupted QuickBooks file?
A. QuickBooks File Doctor Ease, rebuild and troubleshoot your company file, or recover the lost data.

Gabby Taylor, combines financial expertise with literary prowess. With over a decade in finance, she crafts insightful narratives on navigating fiscal complexities
