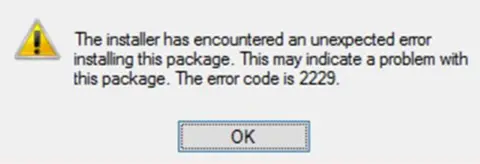
Intuit Data Protect helps you ensure the safety of your business data by backing up QB files and folders. Sometimes, however, you might receive an email informing you that the Intuit Data Protect Backup has failed due to QuickBooks error code 2229. The following error message will be shown in the email notification:
| “Intuit Data Protect Backup Failed: Error #2229” |

This error code can appear when you have canceled the backup data process even before it can be completed. The backup data process depends on the amount of data that you have selected to backup.
To fix this error, you need to manually start the backup data process and allow it the sufficient time to get finished. Let’s dive into the article to explore how you can use Intuit Data Protect to backup your data successfully.
Why Do You Face Intuit Data Protect Error Code 2229?
As stated earlier, you can encounter QuickBooks error code 2229 if you have canceled the Intuit Data Protect backup process before it could get finished. The first data backup will always take longer to complete than subsequent backups. Therefore, you need to allow sufficient time for the data backup process to be completed on your system.
Now, let’s proceed to the next section to learn the steps to troubleshoot this problem.
Step-Wise Process to Resolve QuickBooks Error Code 2229
You can easily troubleshoot QuickBooks error code 2229 by manually activating the Intuit Data Protect backup process. The important thing is that you must not cancel the data backup process and allow it to be completed seamlessly. Here are the steps that you should follow:
- Launch QuickBooks on the computer or server where you store the company file. You can find out the location of the company data by pressing F2 and opening the Product Information window.
- Open the File menu and go to Back Up Company.
- Choose Set Up/Activate Online Backup.
- Log in with the email that you used to sign up. (This is different from your QuickBooks login.)
- Choose Continue.
- Choose the QB company file and then go to Continue. If you have the complete PC plan, choose the folders you wish to back up. Now, go to Continue.
- Mark the checkbox to Back up local selected documents and then go to Continue.
- Now, select the files and folders you want to back up and choose Continue.
- Choose when your daily backup should run and click Continue.
- Configure the notifications settings and then tap on Continue.
This will set up Intuit Data Protect and start backing up your data. Let’s go to the following section to discover how you can backup your data using Intuit Data Protect at any time of the day.
Backup Your Data Manually Using Intuit Data Protect
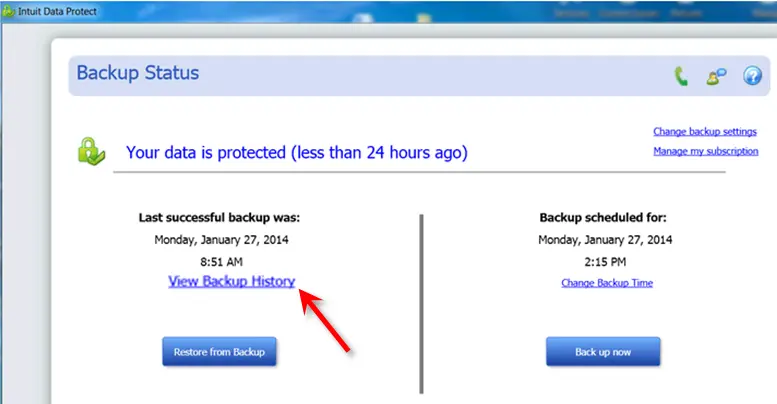
After you activate Intuit Data Protect on your computer, it backs up your data automatically once a day. It is also possible to manually backup your data using Intuit Data Protect at any time of the day. Here’s how you can do so:
- First and foremost, you should identify the Intuit Data Protect icon on the Windows toolbar and right-click it.
- Choose the Open Intuit Data Protect option, and after that, tap the Back Up Now button.
- At this point, select the files and folders that you need to backup.

- Click Continue and immediately tap the Backup Now button.
Finally, you will be able to backup your data using Intuit Data Protect on your computer.
Winding Up
In this comprehensive guide, we walked you through the step-by-step process to resolve QuickBooks error code 2229. Hopefully, you can now backup your data using Intuit Data Protect seamlessly. If, however, you continue to run into this error code or have a query, you can connect with a QB professional for real-time assistance.
Frequently Asked Questions (FAQs)
Why am I unable to backup data with Intuit Data Protect?
a. Using an outdated QuickBooks Desktop or a discontinued version.
b. The IBuEngHost.exe file is running as a Windows user.
c. The Intuit Data Protect backup storage limit has been reached.
d. Using an outdated version of Intuit Data Protect.
e. Corrupted system files and folders.
e. Windows Firewall is interfering with the execution of Intuit Data Protect.
How do I fix QuickBooks Desktop installation errors?
a. Remove older QB versions that are installed on your computer.
b. Utilize System File Checker to repair your system files.
c. Create and use a fresh Windows admin user account on the system.
d. Disable your antivirus software when installing QuickBooks.
e. Run the QuickBooks Install Diagnostic Tool using QuickBooks Tool Hub.
How do background applications contribute to Error Code 2229?

Gabby Taylor, combines financial expertise with literary prowess. With over a decade in finance, she crafts insightful narratives on navigating fiscal complexities
